This guide explains the critical process of determining working length in endodontic therapy, covering coronal reference points, Ingle's radiographic method, and the use of electronic apex locators for accurate instrumentation.
In endodontic therapy, the success of the procedure hinges on the clinician's ability to clean, shape, and obturate the root canal system accurately. Central to this is the determination of the working length (WL). Working length is defined as the precise distance from a chosen coronal reference point to the apical constriction. Establishing this measurement ensures that instrumentation occurs within the canal, preventing the clinical errors of over-instrumentation (extending beyond the apex) or under-instrumentation (leaving infected tissue in the apical portion).
The Foundation: Reference Points and the IAF
Before any measurement can be recorded, the clinician must establish a consistent starting point. This is known as the Coronal Reference Point. Because the measurement is a linear distance, any shift in where the ruler or instrument begins will invalidate the final result. Common reference points used in clinical practice include:
The center of the incisal edge (for anterior teeth)
The tip of a cusp
The buccal cusp
The distobuccal (DB) cusp
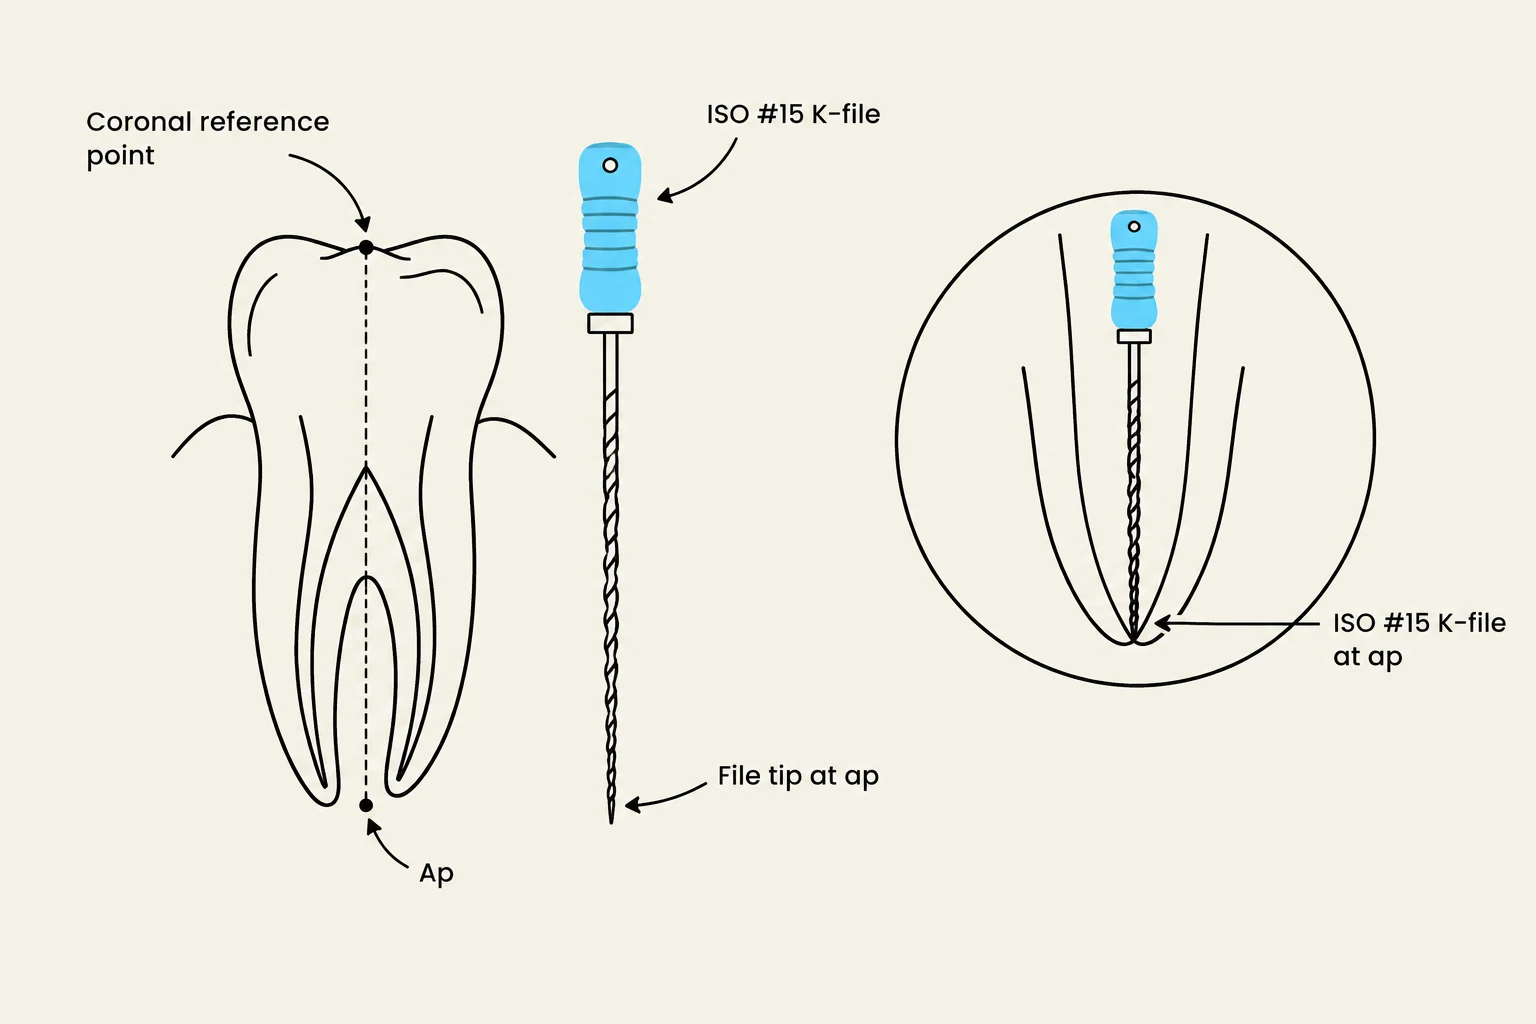
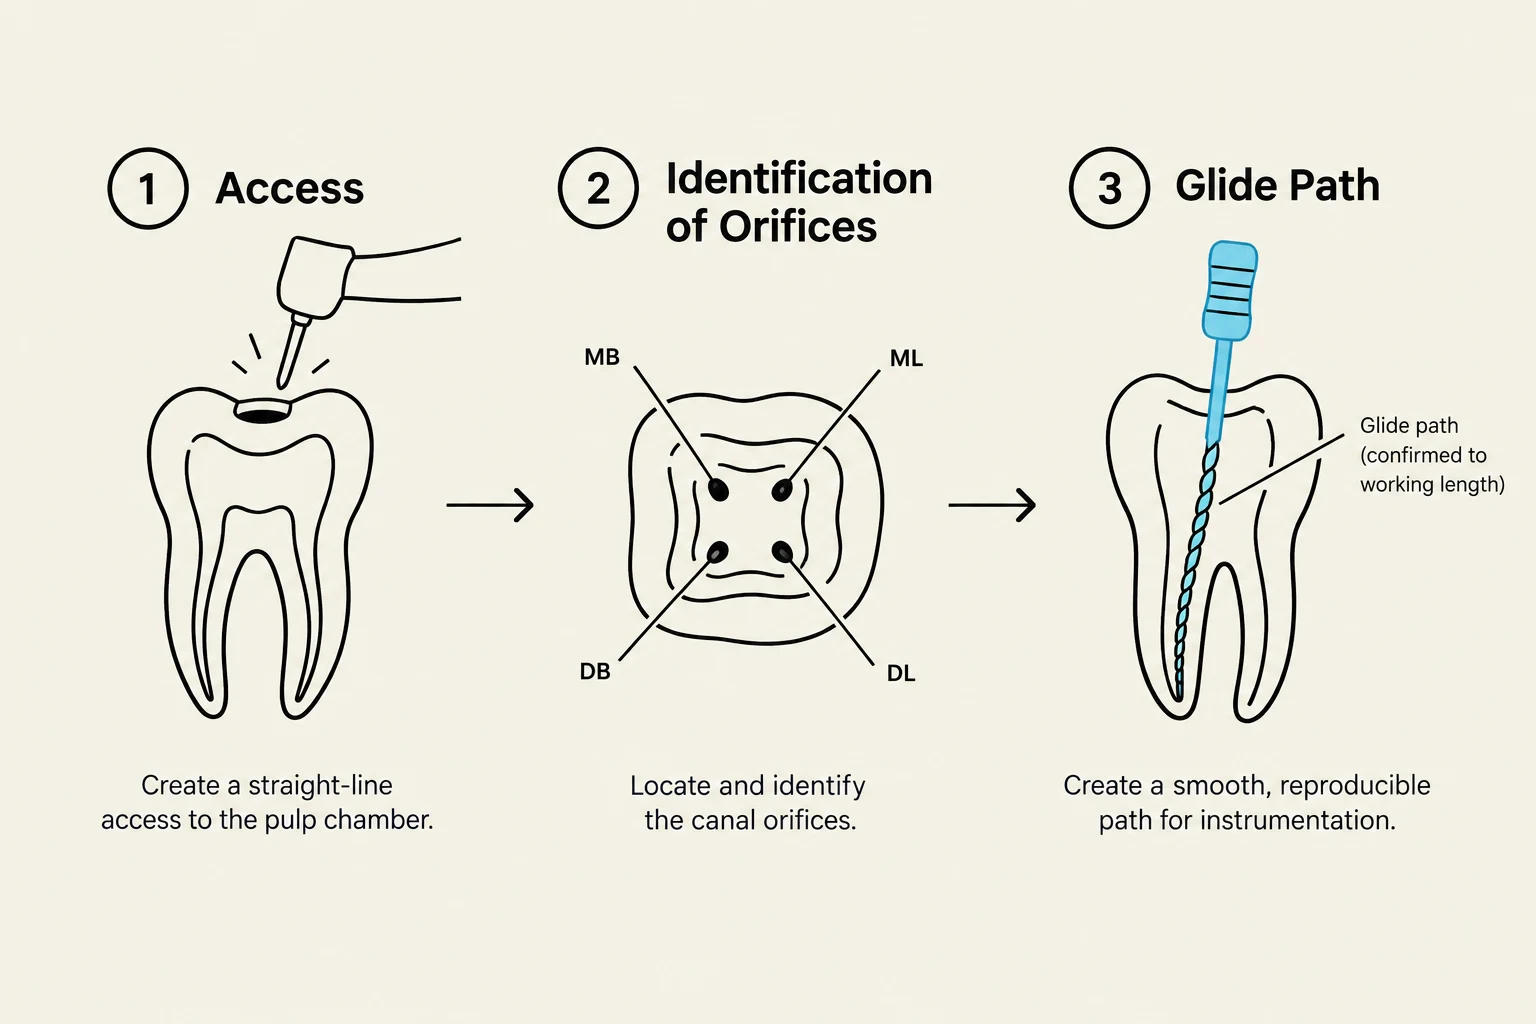
Once a glide path has been established, the clinician selects the Initial Apical File (IAF). The IAF is the first hand file that "binds" or engages moderately at the working length. While the specific size may vary depending on the canal morphology, a common choice is an ISO size #15 K-file. This file should engage the canal at a distance approximately 1 mm from the radiographic apex to establish a reliable baseline for further measurement.
Diagram illustrating the placement of an ISO #15 K-file in relation to the apex and coronal reference point of a tooth.
Ingle’s Radiographic Method
For clinicians relying on radiographic verification, Ingle’s Method provides a systematic, step-by-step approach to finding the working length. This method uses a "trial and error" approach with radiographs to refine the measurement until it is precise.
The procedure follows these specific steps:
Establish a coronal reference point.
Initial Measurement: Take a radiograph, measure the distance from the reference point to the radiographic apex, and subtract 2 mm from that total.
Adjust the Stopper: Set the instrument stopper to this new, reduced measurement.
Insertion: Insert the instrument into the root canal.
Verification: Take a subsequent radiograph to see where the instrument tip sits relative to the apex.
Refinement: Calculate the difference between the instrument tip and the radiographic apex to find the final length.
Clinical Decision Rule:
If the difference (X) between the instrument tip and the radiographic apex is >0.5 mm long or >2 mm short of the apex, adjust the length to X=1 mm and verify with a new radiograph.
If X is between 0.5 mm long and 2 mm short of the apex, adjust to X=1 mm without needing additional radiographs.
The final working length is recorded as 1 mm short of the patency length.
Electronic Apex Locators (EAL)
In modern endodontics, electronic Apex Locators are frequently used to provide highly precise measurements of the apical limit. These devices measure the electrical impedance between the periodontal ligament and the oral mucosa to determine the position of the file relative to the apical constriction.
Protocol for Using an Apex Locator
To ensure accuracy, the clinician should follow a strict sequence:
Preparation: Ensure the battery is charged and the coronal third of the canal is clean.
Connection: Attach the lip hook to the patient's lip and connect the file to the file clip.
Approaching the Apex: As the file moves toward the apex, the device will enter a "green zone" accompanied by an intermittent beep.
Reaching Patency: When the device reaches the "red zone," the beep becomes continuous, indicating the file has reached the apical constriction (a 0.0 reading).
Diagram illustrating the use of an apex locator in endodontic procedures, showing different readings and audio cues as a file advances through a root canal.
To find the exact working length, the clinician should withdraw the file approximately 2–3 mm, then advance it back toward the apex until the continuous full-tone beep is heard. At the exact moment the full tone begins, the stopper should be adjusted to the reference point. This reading is considered patency. It is vital to repeat this process until a reproducible reading is obtained.
Summary of Clinical Workflow
Successful working length determination requires a synthesis of radiographic assessment and electronic precision. Whether using Ingle's method or an apex locator, the goal remains the same: to identify the apical constriction and establish a safe, reproducible limit for instrumentation.
Method
Primary Tool
Key Advantage
Ingle's Method
Radiograph
Visual confirmation of anatomy
Apex Locator
Electronic Device
High precision at the apical constriction
Diagram illustrating the three steps of creating a glide path in endodontic treatment: Access, Identification of Orifices, and Glide Path creation.
References
8 ENDO 538 - Working Length 2026 final.pdf (University of Maryland School of Dentistry)
Keep reading for free.
Create an account to finish this reading and make it part of your study routine.