


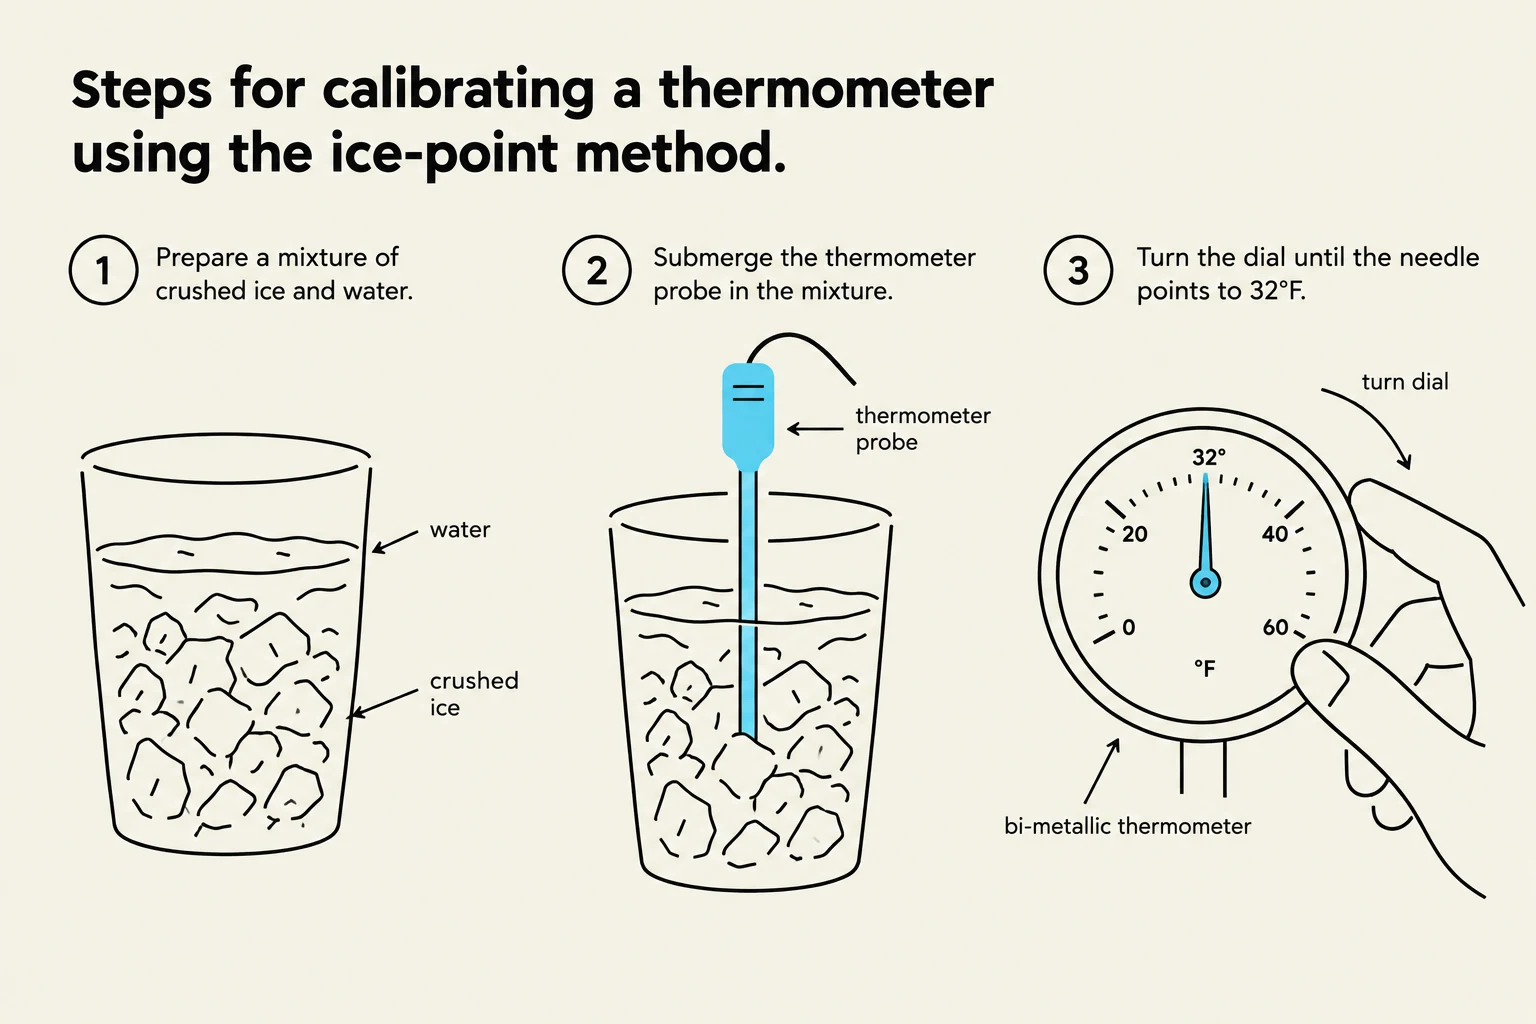
In any food service or laboratory environment, temperature control is the cornerstone of safety and quality. Whether you are ensuring that a steak is cooked to perfection or verifying that a refrigerator is keeping perishables out of the "danger zone," the accuracy of your measurements is paramount. This article explores how to select the appropriate thermometer, the critical importance of calibration, and the best practices for obtaining precise readings to prevent foodborne illness.

Understanding Time-Temperature Abuse
Before diving into the tools, it is vital to understand why we measure temperature in the first place. One of the most significant risks in food handling is time-temperature abuse. This occurs when food remains in unsafe temperature ranges for extended periods, allowing pathogens to grow.
To manage this risk, professionals must monitor both time and temperature simultaneously. If a device records a temperature spike during a specific timeframe, it is essential to identify the highest temperature reached during that period of abuse to determine if the food is still safe to serve or must be discarded.
Exam Tip: When analyzing temperature logs, always look for the "peak" temperature reached during a period of time where the temperature was outside the safe zone. This peak value is the most critical indicator of potential spoilage or pathogen growth.
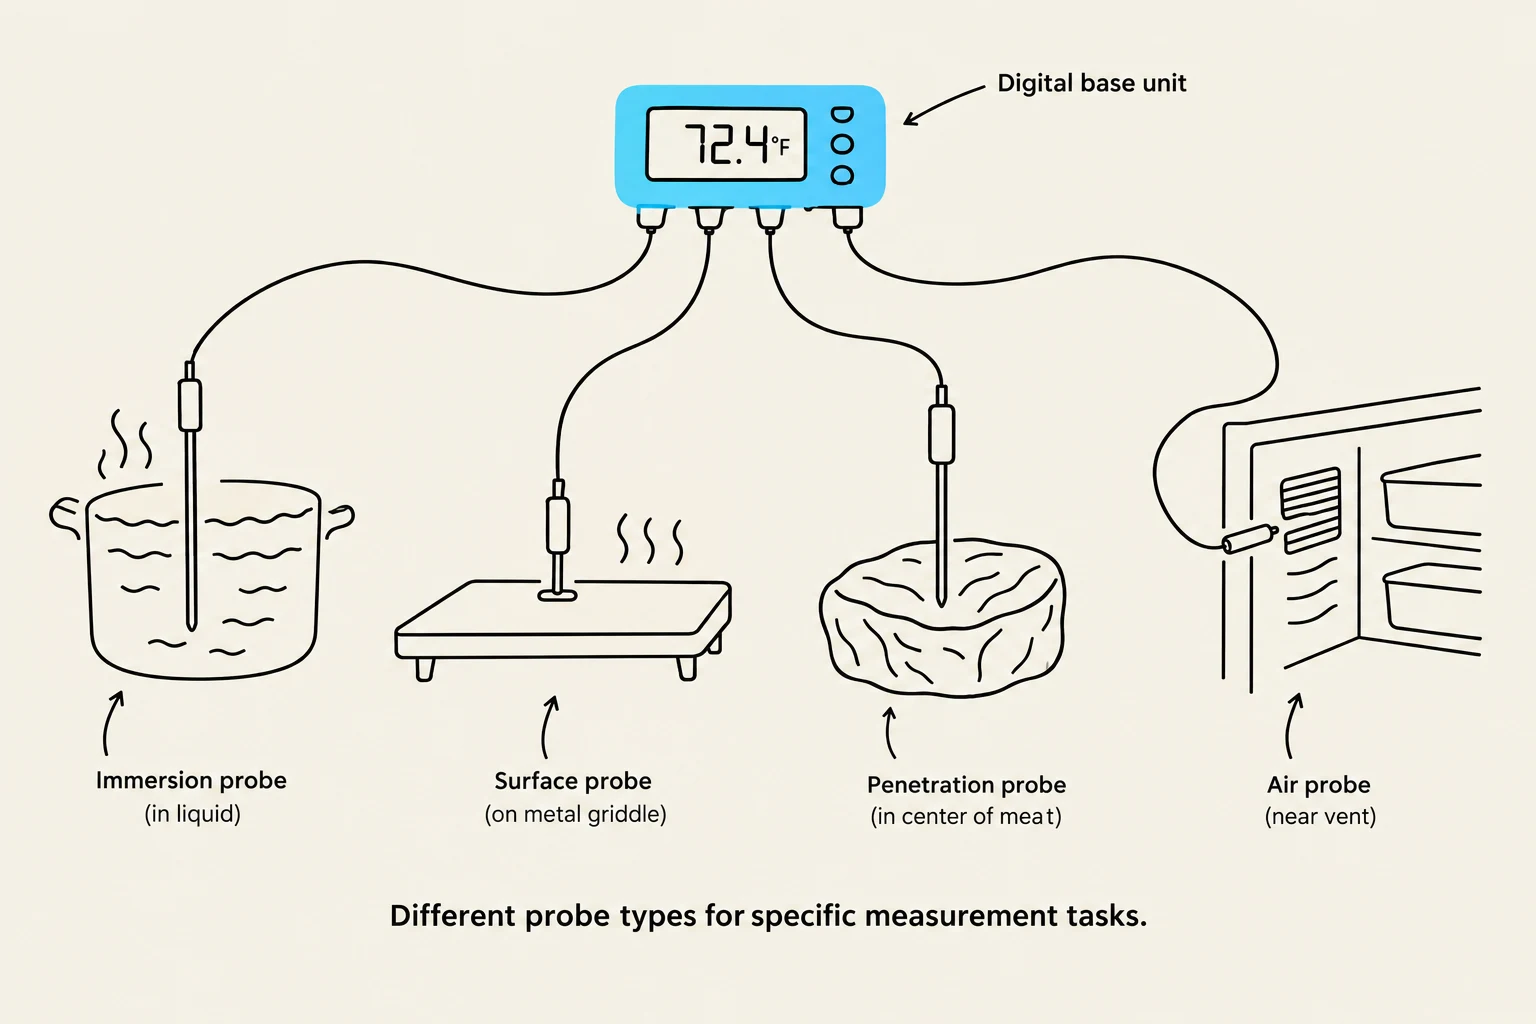
Selecting the Correct Thermometer
Keep reading for free.
Create an account to finish this reading and make it part of your study routine.
Continue reading freeAlready have an account? Log in
Updated