Lateral Pressure and Instrumentation Techniques in Periodontal Therapy
This guide explains the critical role of lateral pressure, angulation, and adaptation in effective periodontal instrumentation for calculus and plaque removal. It covers techniques to avoid burnished calculus and prevent patient and clinician injury.
In periodontal therapy, the goal of instrumentation is the thorough removal of calculus and plaque biofilm to promote tissue healing. Achieving this requires more than just moving a tool across a tooth surface; it demands a precise combination of lateral pressure, correct angulation, and proper adaptation of the instrument's cutting edge. Whether performing supragingival calculus removal or subgingival root debridement, the clinician must master the physics of the instrument-to-tooth relationship to ensure efficacy while preventing injury to both the patient and themselves.
Understanding Calculus Deposits
Calculus is categorized by its location relative to the gingival margin. Supragingival calculus deposits are located coronal to the gingival margin, typically on the crowns of the teeth. These can range from light deposits to heavy, thick accumulations.
Light Supragingival Calculus: Often managed with sickle scalers or curets.
Heavy Supragingival Calculus: May require more aggressive tools such as periodontal files, sickle scalers, or powered ultrasonic instruments.
The Mechanics of Angulation
Angulation is defined as the relationship between the face of the instrument and the tooth surface. Mastering this angle is critical because it determines whether the instrument will successfully fracture calculus or cause harm to the soft tissues.
The Ideal Range
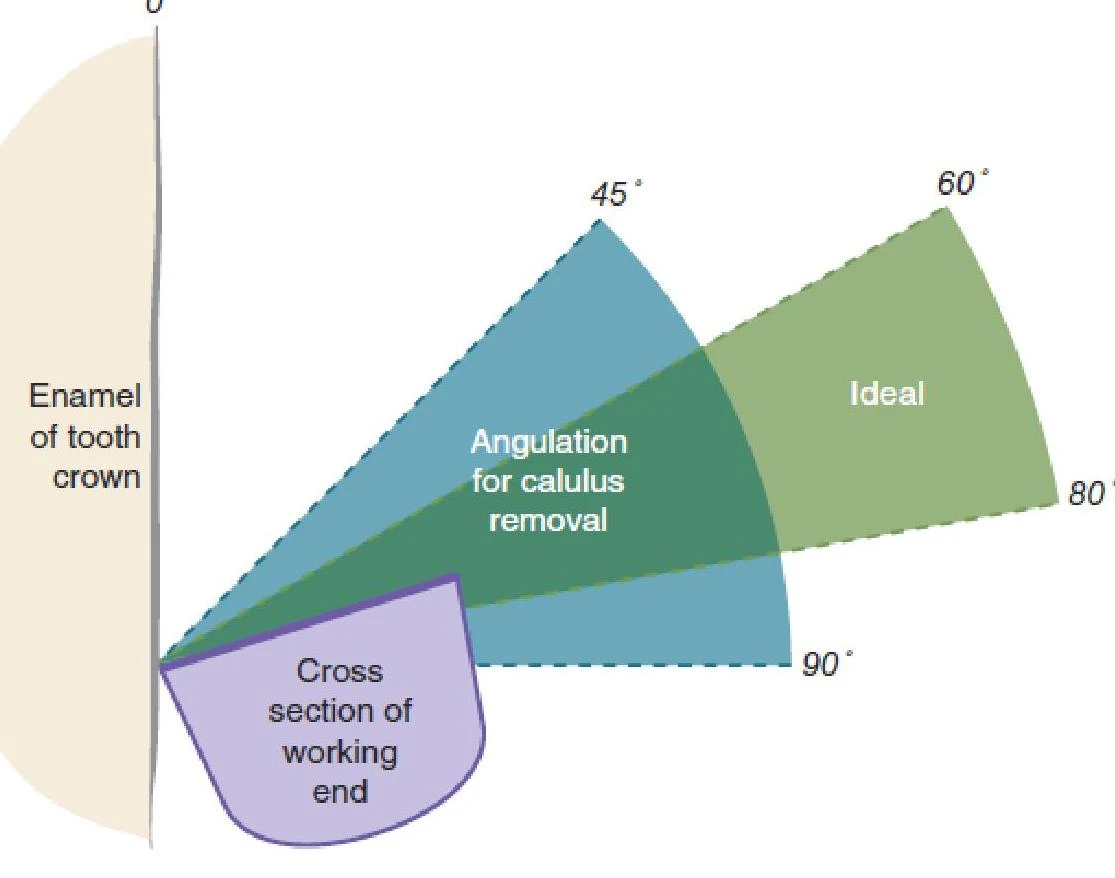
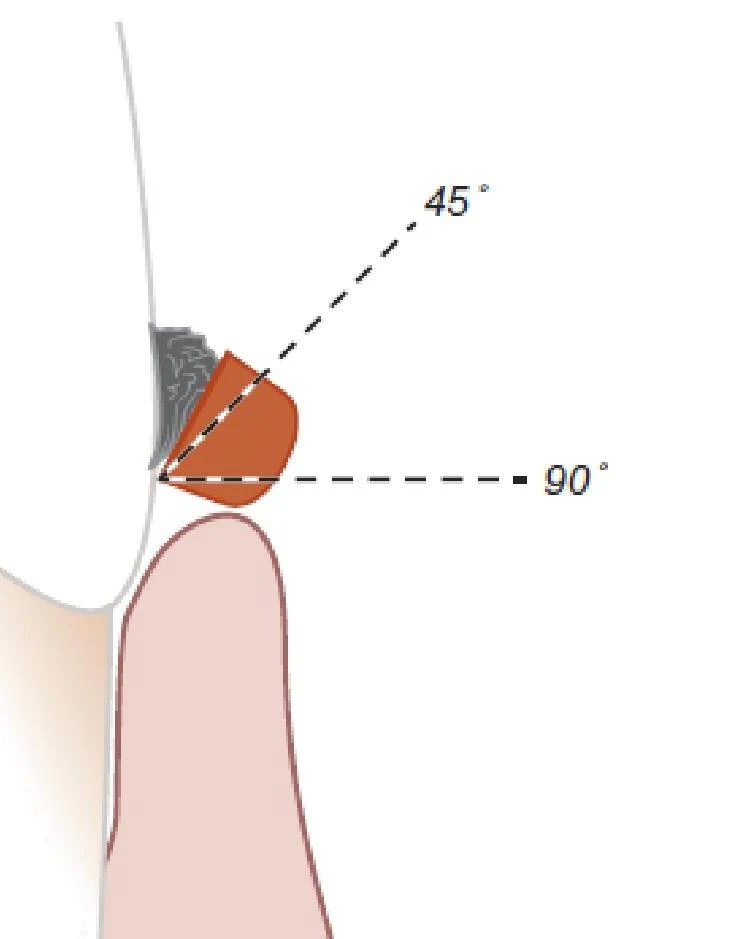
For effective calculus removal, the face-to-tooth surface angulation must be maintained between 45 and 90 degrees. When the instrument is within this range, the cutting edge can "bite" into the deposit, allowing it to fracture and be removed.
Diagram illustrating the angulation for calculus removal from a tooth crown, showing the enamel and the cross-section of the working end of a dental instrument.
Consequences of Angulation Errors
Students often struggle with maintaining this window, leading to two primary clinical errors:
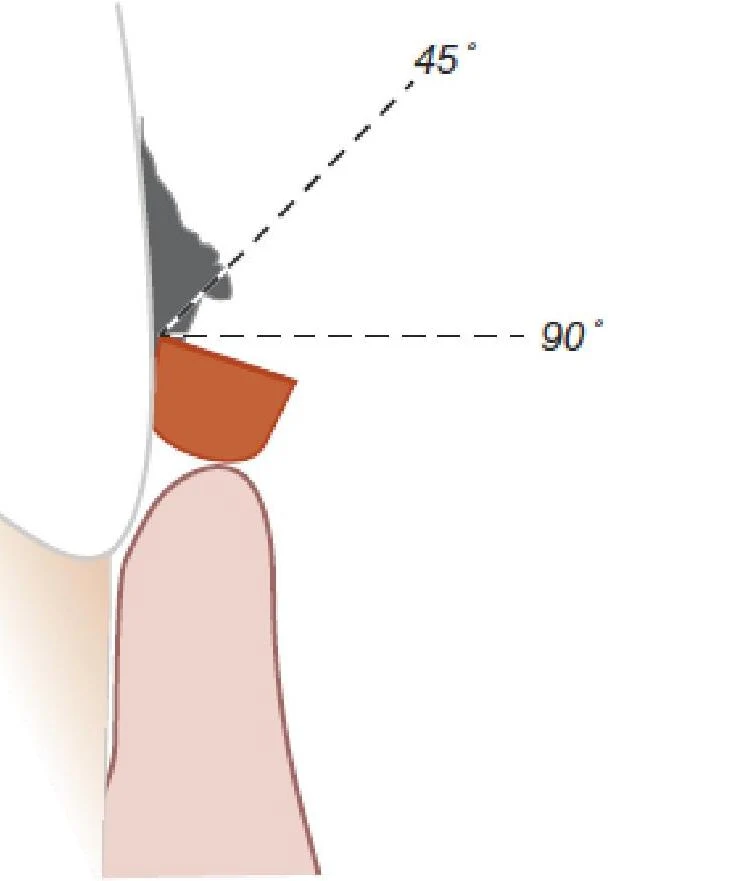
Angulation < 45 Degrees: If the angle is too shallow, the cutting edge will simply slide over the surface of the deposit rather than engaging it. This leads to "burnished" calculus, where the deposit is smoothed rather than removed.
Angulation > 90 Degrees: If the angle is too steep (obtuse), the cutting edge may contact the lining of the periodontal pocket. This results in direct tissue injury to the patient.
Diagram illustrating angles of 45 and 90 degrees in relation to a dental structure.
Diagram illustrating angles of 45 and 90 degrees relative to a point.
The Three Forces of Instrumentation
To control the instrument effectively, a clinician must manage three distinct types of force:
1. Pinch Pressure
This is the pressure exerted by the fingers within the modified pen grasp while holding the instrument handle.
2. Stabilization (Fulcrum)
Stabilization is the act of preparing for an instrument stroke by locking the joints of the ring finger and pressing the fingertip against the tooth surface. The fulcrum finger acts as a "support beam" for the hand, providing the necessary control during the stroke.
3. Lateral Pressure
Lateral pressure is created by applying inward pressure with the index finger and thumb against the instrument handle. This pressure should be applied prior to and throughout the entire instrumentation stroke.
Clinical Note: Adjusting Pressure for Task
The amount of lateral pressure required varies depending on the clinical objective:
Assessment: Requires a feather-light touch against the tooth.
Calculus Removal: Requires firm lateral pressure.
Root Debridement: Requires less lateral pressure than calculus removal.
Avoiding Burnished Calculus
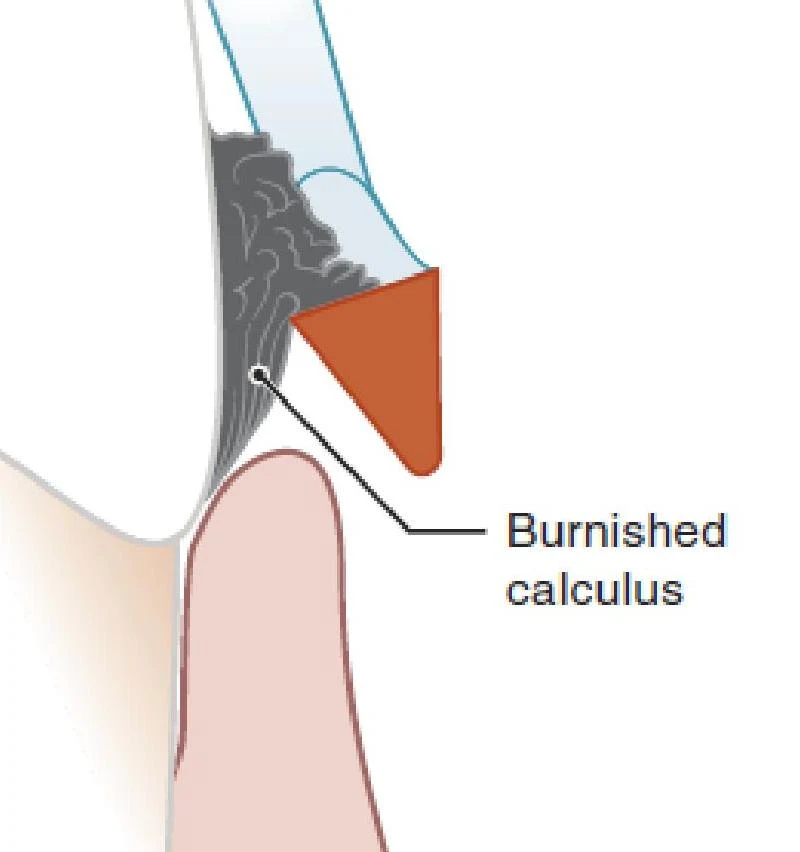
A common pitfall in scaling is "burnishing," which occurs when a clinician removes only the outer layers of a deposit instead of fracturing it away.
The Danger of Burnished Deposits
Burnished calculus is smooth and significantly more difficult to detect and remove than irregular deposits. More importantly, burnished deposits retain plaque biofilm, which continues to fuel the inflammation of periodontal tissues.
Diagram illustrating burnished calculus on a tooth surface.
Correct Technique: Sectional Removal
Large supragingival deposits are rarely removed in a single piece. To avoid burnishing, clinicians should remove large deposits in sections, targeting one small area at a time.
Diagram illustrating the process of tooth extraction in three sections.
Injury Prevention and Ergonomics
Instrumentation is a repetitive task that carries risks of both patient injury (tissue trauma) and clinician injury (muscle strain).
Preventing Patient Injury
To avoid tissue injury, ensure the angulation never exceeds 90 degrees and always maintain correct adaptation of the tip-third of the cutting edge.
Preventing Clinician Injury (Muscle Strain)
Maintaining the same hand, arm, or back position for extended periods can lead to significant muscle strain. Use the following strategies to mitigate risk:
Relax Between Strokes: Finger muscles should be relaxed when returning the working end to the base of the pocket. Constant pressure on the fulcrum or handle is stressful to the muscles.
Control Your Pace: Do not perform strokes in a rapid, nonstop manner. A faster pace makes the instrument harder to control.
The "Pause and Stretch" Method:
Stop every 20 minutes to return the instrument to the tray.
Stretch fingers apart and hold, then slowly curl them.
Take a 10-minute break every hour to allow for sufficient recovery.
Visual Rest: Periodically rest your eyes by focusing on distant objects to reduce ocular strain.
Exam Tip: The Relationship Summary
If asked about the relationship between pressure and results: